Self-service user manual for business client
- Shipment finalisation
- Delivery of the shipment
- Ordering courier collection
- Shipment tracking
- Service management
- User management
Shipment finalisation
Select ‘New shipment’ on the menu
A form will open where you can fill in the fields for the recipient and destination. New possibilities:
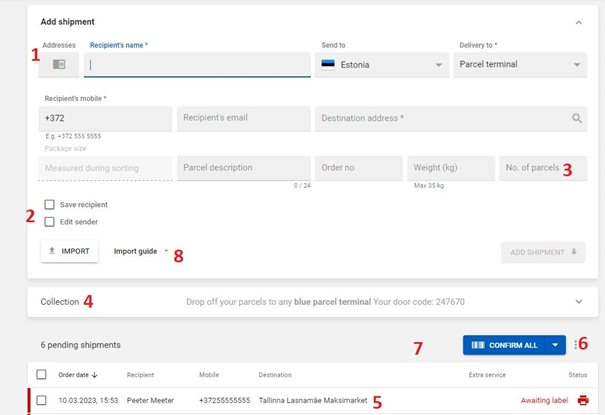
1. A directory where both the recipient and the sender can be saved (if the person who creates the order is not the sender of the parcel and the wish is to display the actual sender of the parcel on the label). The sender’s name can be added to the label by selecting the corresponding option in the parcel label settings: ‘Name of the parcel sender’.
2. Data can be entered in the directory by ticking the corresponding box to save the data after its entry on the shipment form. Contacts can be removed from the directory.
3. If several parcels need to be sent to the same recipient at the same time, the number of parcels to be sent can be entered in the ‘No. of parcels’ box. The system creates orders with the corresponding number of unique codes. This field/box can stay empty when sending a single parcel.
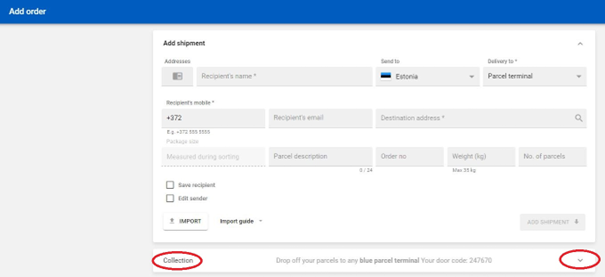
4. You can select the method of delivery to Itella to in the block entitled ‘Collection’. By default, it displays the permanent door code of the user who is currently logged in, which can be used to insert parcels in the blue parcel terminals. There is no need to reserve parcel lockers.
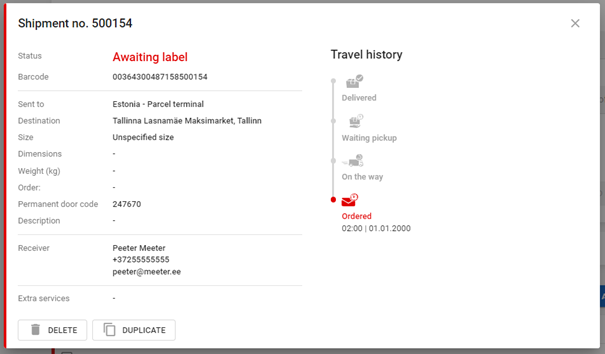
5. There are orders with the ‘Awaiting label’ parcel label in the pending orders area. Click on the row in order to open the order. In this view, you are able to delete and clone the order (if the No. of parcels was not indicated in the previous view).
6. Unconfirmed orders can be exported as an Excel file by clicking on the ellipsis.
7. Parcel labels are generated when orders are confirmed. You can select the label format (page size/pieces per page) by clicking on the arrow.
8. Shipment information can be imported from an *xlsx file. The file format and the destination codes are available under the import guide. Shipments to Latvia and Lithuania will be opened for business clients no later than May.
Delivery of the shipment
Once the orders have been created, they must be delivered. Note: Parcels must have unique parcel labels with parcel codes assigned to shipments.
There are three options for delivering parcels in the self-service environment:
- In order to insert parcels in any blue parcel terminal, the user’s permanent door code is displayed.
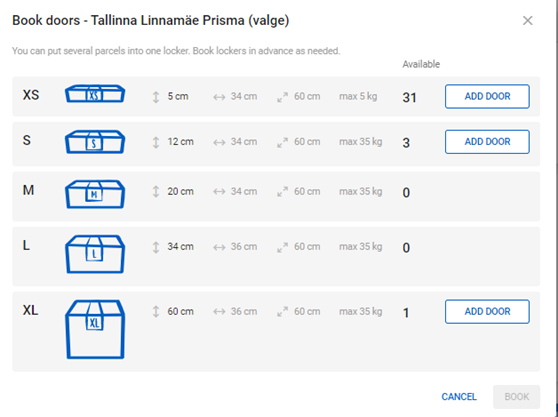
- In order to insert parcels in any white parcel terminal, you can reserve a specific locker. Reservations can be used with a specific door code that is valid until the end of the following day (the exact time depends on the opening hours of that particular location).
In the self-service environment, you can make the correct selections under the new shipment form (via the arrow at the end of the line):
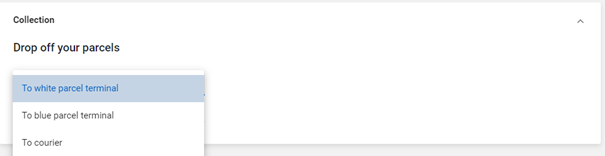
The number of parcel lockers that can be reserved in the white parcel terminal is limited. The reservation is valid until the following evening; therefore, it is not necessary to make reservations until shipments are ready to be delivered.
When parcels are handed over to the courier, the order collection will be displayed in this block (if ordered). Collections can be ordered in the menu entitled ‘Collection’.
Ordering courier collection
The prerequisite for a collection is that the service has been activated. You can do this in the ‘Services’ menu. You must enter a single collection address in order to activate the service. There may be more than one collection address.
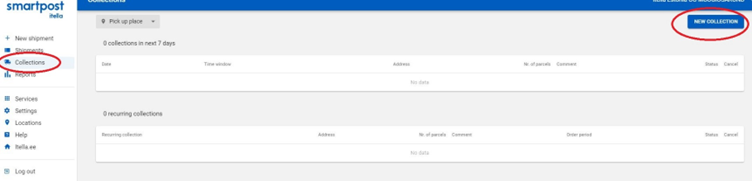
The collection order is created in the ‘Collection’ menu.
If you wish to order several collections at once or a recurring collection with a fixed regularity, you can tick the ‘Recurring collection’ box in the self-service environment. In the ‘Recurring collection’ section, you should indicate the days of the week on which you expect the courier to collect the parcels.
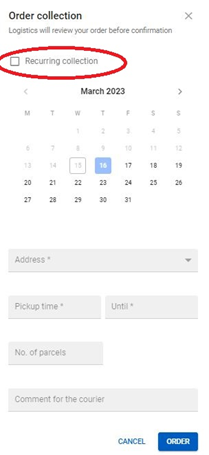
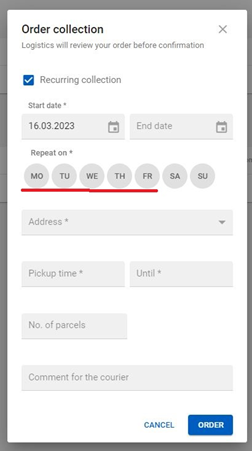
A single collection order and the recurring collection will not take effect until it has been approved by logistics. Orders created on the basis of the confirmed recurring collection do not need any further confirmation. On the basis of the recurring collection, collection orders are created up to seven calendar days beforehand.
If it is necessary to collect orders from the same location on different days of the week, separate ‘recurring collections’ must be made, too. The number of recurring collections is not limited.
The collections page displays both individual collections as well as recurring collections, which are the basis for the creation of permanent collection orders:
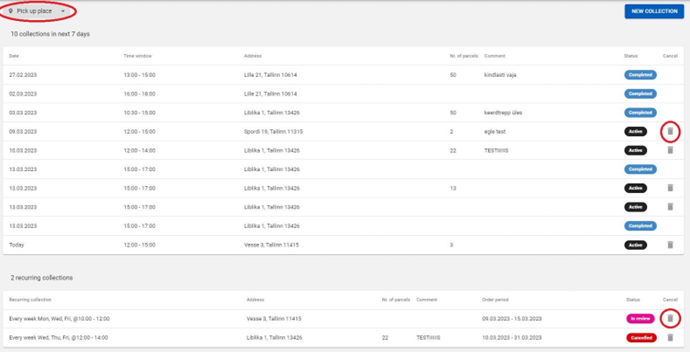
If you discover that the collection order is not really required, it must be cancelled at the first opportunity.
If there are many collections, you can filter them by the collection location.
Shipment tracking
Shipments for which a parcel label has been created are visible under the ‘Shipments’ menu.
More columns can be displayed in the list – in order to do this, click on the icon:

In order to export orders to an *xlsx file, click on the icon:

The downloadable format is the exact same as in the old self-service environment.
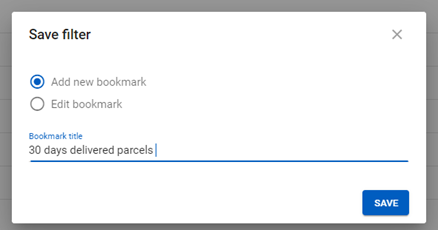
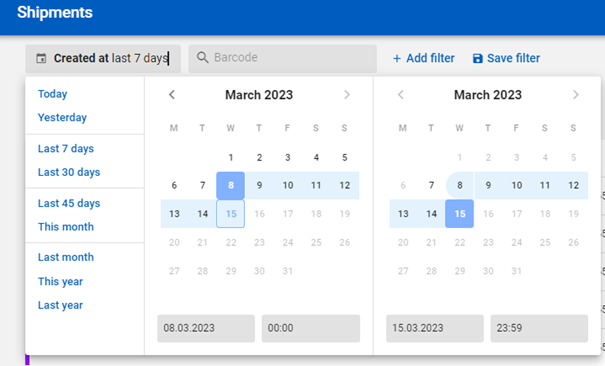
Each user can create their own view of orders by using the suitable filters:
You can save the completed report with the appropriate filter options and columns by pressing

and adding a suitable title.
The created reports can be then used in the ‘Shipments’ menu.
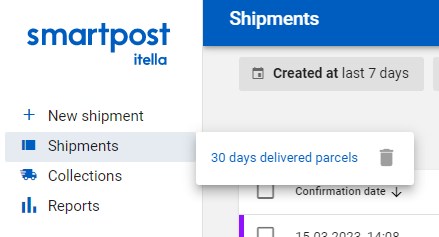
You can edit and delete created reports as well as add new ones.
The reports have the latest content when using pre-defined time periods:

Service management
The services you use can be seen and managed in the ‘Services’ menu.
Clients who joined the Smartpost service in the old system are able to use the same services in the new system. The visibility and configuration of services will be limited to clients until the old Smartpost information system is no longer operational (May 2023).
The most significant update is the API key, which is required to use the automatic data exchange. This key is visible to users in the ‘administrator’ role.

The second new service is entitled ‘Customised parcel label’:

This can be used to configure whether the label displays ‘Client order number’ and/or ‘Content description’. This field is not necessary for the provision of transport services. Nonetheless, this can be done if there is a need to show or hide these fields on the label. Additionally, it is possible to configure what is displayed on the parcel label under ‘Sender’.
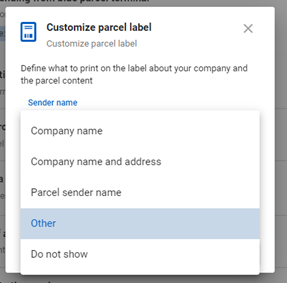
Other text (up to 100 characters) can also be entered. The sender can remain anonymous if they wish.
Changes made to the parcel label will also affect previously created orders.
Note: Only one parcel label may be used with each barcode, i.e. the labels taped to the parcels must be unique.
User management
In Smartpost’s new self-service environment, each user will have a separate designator. To ensure the security of client data, login credentials cannot be forwarded to other persons. The permanent door code for inserting parcels into blue parcel terminals belongs to a specific person who must keep it private.
Any company user whose role is ‘administrator’ or ‘main user’ can add new users as well as create door codes for them. It is also possible to delete users. User management can be accessed in the ‘Settings’ menu.
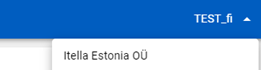
One person may be linked to many companies and they can also have a personal account (prepaid). Login credentials are the same; roles can be changed in the blue bar at the top of the page:
The My.smartpost.ee self-service environment for business clients has just been completed. There will be new services and features in the future, which will be covered in this guide at a later date.